I have another layout to share that I created with the design team kit sent to me from Jill at Memorable Seasons. My kit featured the BoBunny Sophie line and you can see that entire line here. The paper I used for this layout is called Wild Flowers. I also used these stickers that coordinate with this kit: Pretty Sisters and these brads: Sophie iCandy. I also used the coordinating Double Dot Paper in Mulberry color.
Here's a picture of the layout and the details on how I made it:
For my main photos, I used Photoshop Elements to crop the three middle pictures down to 2x2 size, then put them on one 4x6 canvas to print them off all as one photo. The top photo and the bottom photo are both separate 4x6 photos that I glued onto the strip of center photos. So the whole thing looks like one big photo collage and only took 3 sheets of 4x6 photo paper. The entire photo collage is bordered with a strip of the Mulberry colored Dotted paper that I punched with the Martha Stewart Loopy Edge punch. I did add a white edge underneath the loopy border and I colored that white paper pink with the new Spun Sugar Distress ink pad.
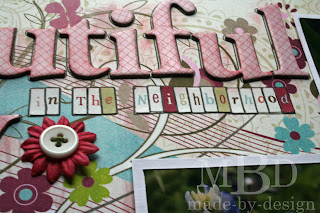
The sticker was completely flat, but I added a blue flower on top of their printed flower, and I added a real glittered iCandy brad where they had the printed one and also mimicked the tied bow too. I love how the printed sticker had a three dimensional look to it, but I was able to step it up a notch and add a little more real dimension. I also sanded the edges of the sticker to help it stand out among all the darker colors and I adhered it to my layout with foam tape.
For the journaling, I used the Ranger Inkssentials white pen and followed the lines already printed on the main background paper. When I erased my penciled in journaling after the white pen ink dried, the white ink faded too, so I re-traced the journaling with the white pen again. After it dried, somehow the white ink has taken on the look of a pink ink. Not sure how that happened exactly, but I LOVE the look and it works beautifully on this layout!
Wednesday, March 17, 2010
Tuesday, March 16, 2010
Time to Think Spring...layout challenge
It's Spring Break here and I don't know about you, but I have all things "spring" on the brain...
So my challenge for this week is to create a layout using the following:
Use a Spring Theme (activities, sights you see, trips you take in the spring, etc)
Use flowers on your project (flowers can be in your photos, papers or added embellishments)
Use ribbon on your project
Here's my sample layout for this challenge:
My layout features some photos I took while on a walk in the greenbelt area of our neighborhood several years ago. I used the new BoBunny Sophie Line papers I received with the Memorable Seasons March Design Team kit to create this layout. The complete line of papers can be purchased here at Memorable Seasons. The names of the papers I used are Stripe, Bouquet, and Sophie.
To create my title, I used these American Crafts Thickers (Coral Criss Cross Chipboard Pattern) and I rubbed some Worn Lipstick Distress Ink on top of the letters with a foam sponge to brighten the color so they would "pop" more on the softer layout background. Once the letters were attached, I traced around them with a black pen.

To create the rest of the title words, I used some Making Memories Noteworthy Tiny Alphabet stickers and also outlined those letters with the same black pen.

I matted my smaller photos with white card stock to make them look like Polaroid snapshots. I basically cut a square window into the rectangular white card stock and glued it down to the photo, then trimmed away the excess photo edges. Then I added some Prima flowers and white buttons with green stitching to give the layout some added dimension.
The Polaroid photos and the main creek photo were all attached to the layout with foam tape. The other two square photos were glued directly down to the papers. I also added a ribbon underneath the photos along the striped paper strip and tied it in a bow on the left side of the layout.
Thanks for looking and I can't wait to see what projects you all create for this challenge with Spring in mind!
Sunday, March 14, 2010
Memorable Seasons--March DT Kit
Here is the design team kit from Memorable Seasons for this month! I received products from the Bo Bunny Sophie line. Stay tuned for some projects I will be posting this week made from the products in this kit...
Tuesday, March 9, 2010
Scrapbook Throwdown Challenge-- "Where's the Beef"
I am hosting the bonus challenge this week over at Memorable Seasons and wanted to share the details here too so everyone has a chance to follow along. Even if you haven't done the other weeks, they are still doing a drawing for everyone who participates this week and the prize will be a gift certificate to the Memorable Seasons online store. I can't wait to see what you all come up with! The Throwdown is a "recipe" to follow for each week. Here's the details:
"Where's the Beef"
Don't be chicken...beef up your album with a two-page layout!
The menu for this bonus meal includes:
1. Main Meal (Two-page layout): Beef is brown, so include the color brown somehow on your layout.
2. Served on your best China Patterns: Pick 3 pattern papers to use on your layout.
3. Beverage will be Punch: Use a punch or die cut on your layout.
4. Sugary Dessert of your Choice: Add some "sugar" to your layout with glitter or gemstones, your choice.
The deadline to finish this challenge if you are entering the contest is Sunday, March 14 by midnight.
Here is my sample for this bonus challenge:
Here's how I followed the challenge "recipe":
1. I created a two-page layout with brown borders.
2. My three pattern papers I used were the yellow and blue plaid on the top, the blue pattern on the 2nd page, and the cream wood grain paper. The letters I used for the title were cut from the backside of the yellow and blue plaid paper.
3. I used a border punch along with some star punches.
4. My "sugar" was added with some Rocky Candy Distress stickles on the larger punched stars and I also added tiny clear gemstones to the center of the silver star sequins on the smaller punched stars.
Here are some more detailed pictures of this layout:
Subscribe to:
Posts (Atom)


